
Film Photos (sketchbook)

Film Photos in Sketchbook


Over the weekend I have been experimenting with film and trying to take light trail exposures. My initial thought of light trails using film was that it wouldn't work. However, I did manage to get some good shots. Taking the photos was a lot of trial and error, as I wasn't able to take a test shot, as I wouldn't be able to see the photo until I developed it. I  overcame this by taking a test shot on my dslr and using the same settings on the film camera.


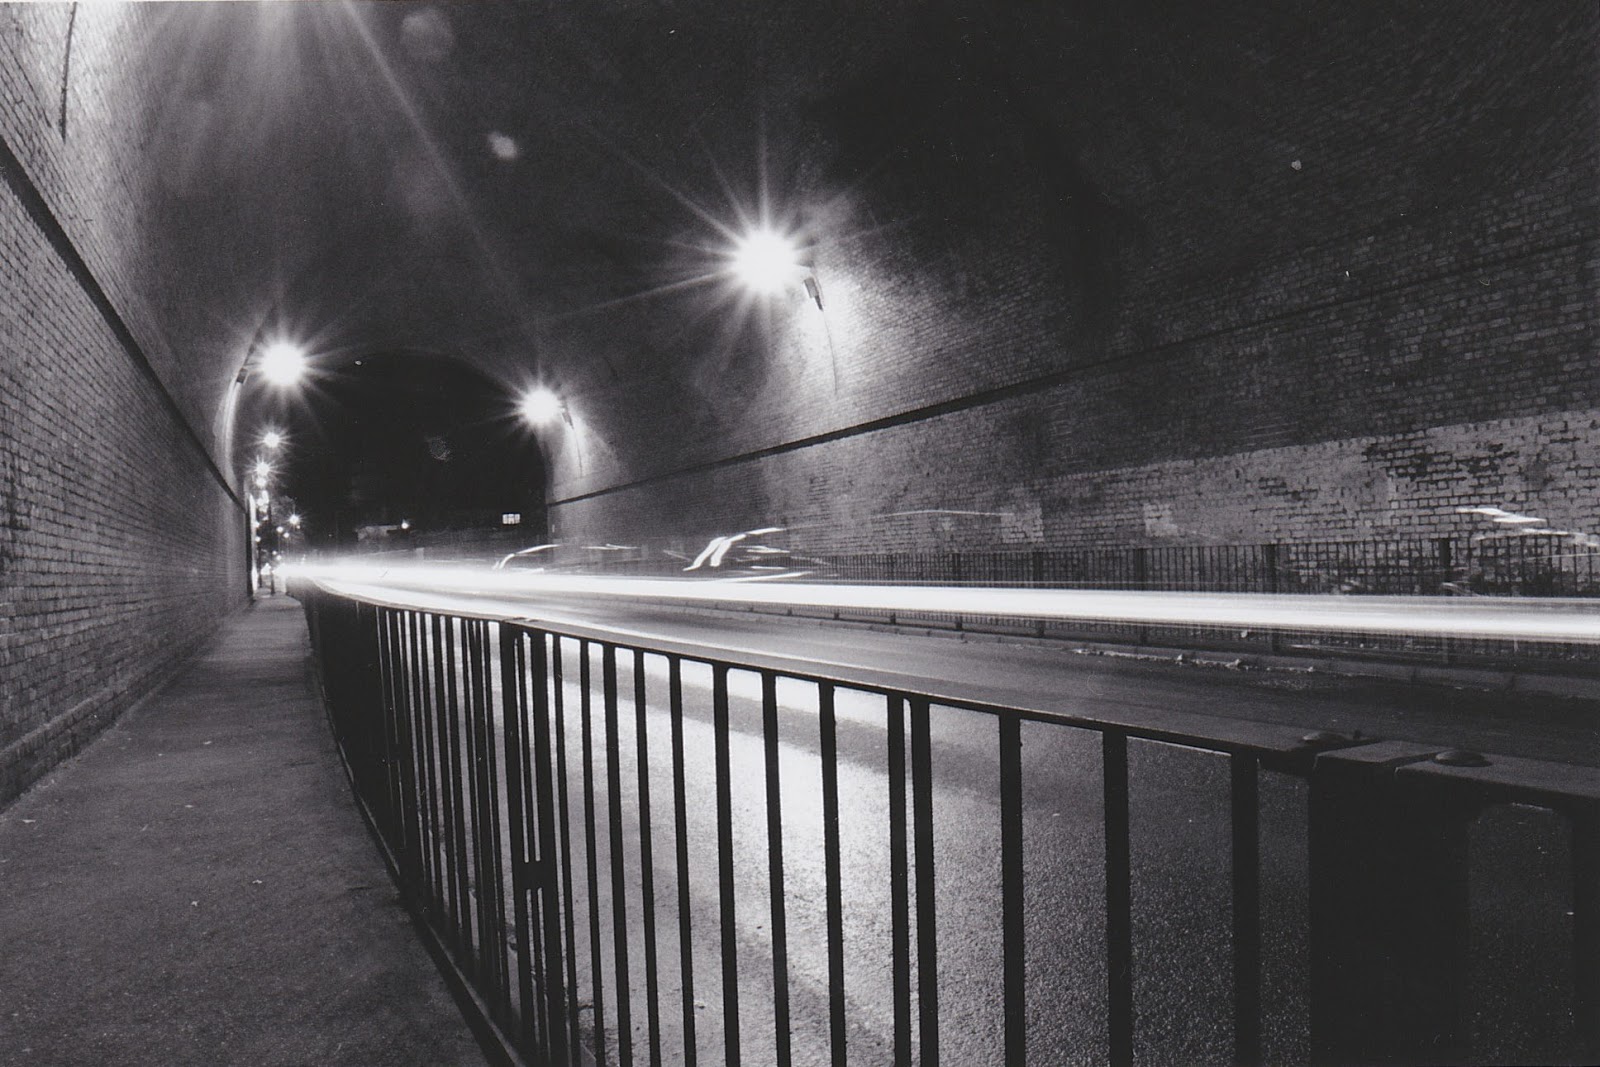
This is one of the photos I've taken from my sketchbook to write up about. I think that the composition has been well thought of, as the brick wall on the left, the light trail and the metal railings all leads to the far left of the photo. This shows that I've incorporated leading lines. The photo was taken at F20 with an 8'' shutter speed. One thing that I could have improved, is to alter the shutter speed, lighty faster, so there was less time for the lights to expand.  The image as it is has a lot of light pollution, as the smaller lights shine very brightly.  When I take future images I will experiment with different shutter speeds to see which creates the least pollution.

I printed the images on paper, I used a grade 3 on the enlarger which allowed there to be contrast from the light trails and the metal.

Comments

Popular posts from this blog

Sam Taylor Johnson

Born on the 4 th of March 1967, Sam Taylor Johnson is an English Photographer and filmmaker. Originally known as Sam Taylor Wood, she started to display her fine art photography in the 1990s. One of the series on her website that I found quite interesting was a group of photos under the title “lone rider”. The photos are taken of lone isolated cars and motorcycles from a side view and the images are all black and white with the shadows and vignetting increased. Looking at the photos I get the feeling of peacefulness and tranquillity as the car is in the centre of the frame, this reflects the simplicity of life. These vehicles are made to be on busy roads, driven at speed and constantly used, which is why it’s peaceful to see them at rest, to see them standing alone. To try and recreate this I will be locating lone cars which are situated in front of a brick wall or a simplistic . I will then try and get the best composition to try and get a similar outcome to Sam Taylo...

Frank Machalowski | Chaos

Frank Michalowski Frank Machalowski is a German freelance photographer who I came across whilst searching for photos that show chaos. After further research i came across a series of photos called "monster".  The photos look really moody to me as they are black and white and have high contrast. The photos include the rush of people. which creates a blur. The way he creates these photos is by using a slow shutter speed of 5 seconds to get the blur. To recreate these photos I am going to go to London and shoot long exposures of people walking past. The equipment I will use will be my camera a tripod a shutter release and a ND filter. The photograph on the left is interesting as it is symmetrical and also has leading lines that draw your eyes to the top third of the picture. I like the different shades of black and grey that the rush of people create. This reminds me of a pencil smudge. This is a photo I took in the style of frank Machalowski. The locati...

Anaglyphic effect in photoshop

After thinking about my options i came to the conclusion that i wanted to create an image with a 3D effect for my final piece.  Creating an anaglyphic photo is actually very simple, it only consists of 3 steps. Step 1)  The first step is to take the image you want to develop and drag it down to the tab which looks like a post it note. this will duplicate the layer so that you have a foreground and a background layer.  Step 2) Once you have your two layers you want to double click on the layer that is at the top. the photo on the left shows what it looks like. what you want to do is look for the three ticked boxes labelled "R" "G" and "B". you want to untick the "R" box. then press ok and you will return back to your photo ready for the final step. Step 3) before we do the final step you must make sure that you have clicked on the top layer before you adjust the layers as if the bottom later is selected you wont be...